

CREATING A QUICK SKYDOME USING A FISHEYE LENS
Last year, I bought a cheap fisheye lens that screwed onto the front of my Fuji bridge camera. It cost me around £25. I bought it primarily to help me capture 360 panoramas.
However, I did discover a neat second use for the lens. With a quick photoshop edit, you can quickly convert an image captured through the fisheye lens into 360 degree skydome. I have to say, the quality isn’t awesome. But, it could definitely be used for bitmap-based lighting.
The quickest way to explain the method, would be to use a quick video. Here you can see the view through the camera with the fisheye lens attached. You need to point the camera up at the sky then take your photo.
Once you have your photo, you need to take the following steps.
1. Load your image into Photoshop. Crop it using a 1:1 ratio box.
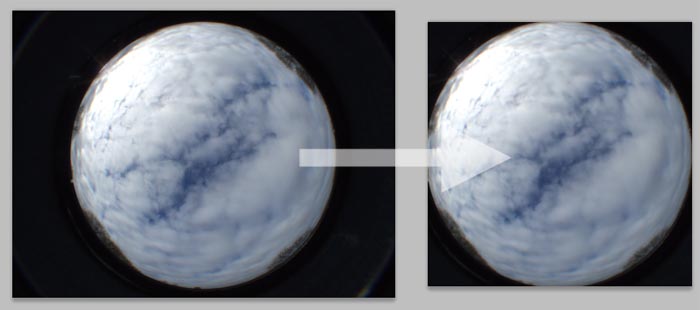
2. Next, use Filter > Distort > Polar Coodinates. Select the “Polar To Rectancular” option. You should now see the upper part of your hemisphere texture.
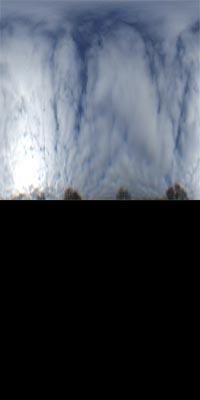
3. In order to spherically map that texture to a sphere, you need double the height of the canvas to create what will be the lower part of your hemisphere texture. Just change the canvas size of the image, making it 200% bigger vertically, adding the blank area to the bottom of the image:
And there you have it, a quick 360 degree skydome. The quality of the image won’t be good enough for use in a CGI render. But, it may come in handy for bitmap-based lighting.