

SHOWING A RULE-OF-THIRDS GRID IN THE 3DS MAX VIEWPORT
As you may already know, one of the long standing methods of good photographic composition is the ‘rule of thirds’. So much so, that most modern digital cameras offer the ‘rule of thirds’ grid as an overlay guide built into the camera. The basic rule is, when composing your photograph, try to locate one or more of your points of interest where the grid lines intersect.
For in depth analysis on this, be sure to check out Wiki Rule of Thirds.
Now, what works in general photography can also work when composing a computer rendered scene. The way in which you position your camera within your scene can make or break a render. Even a scene that contains relatively little detail can be made interesting through careful positioning of the subjects.
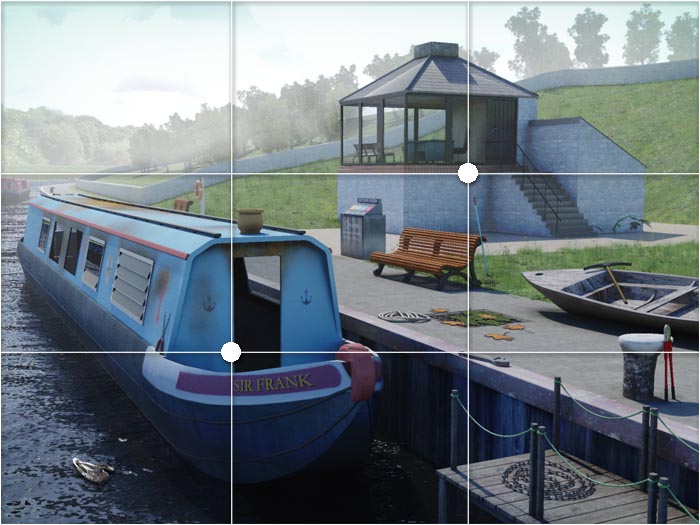
Here’s an example, taken from one of the backgrounds I created for Murder Detective 2: Corruption (published by Tournay Software). There isn’t really much in these scene apart from the canal boat and the building. So, I used the rule of thirds to ensure these two elements fell on grid intersections.
Of course, composing a scene using the rule of thirds on a camera is fairly straightforward. But what about doing it on your 3D software? Well, it’s possible to use the existing safe guides system to depict the rule-of-thirds grid on your viewport. In this instance, we are using 3DS Max.
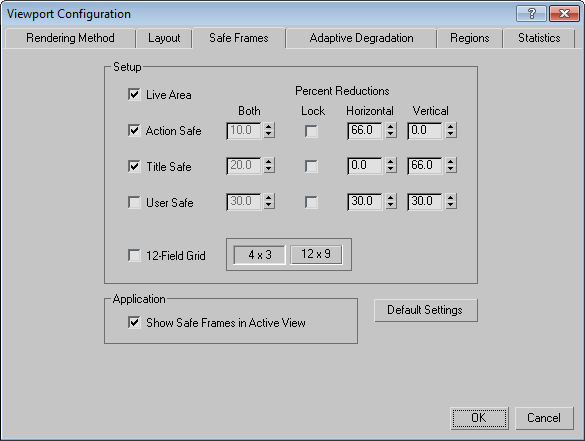
You need to modify your Viewport Configuration / Safe Frames to the following, making sure you unlock the Percentage Reduction boxes:
Once this is done, you should how have a rule-of-thirds grid guide in your viewport, like this:
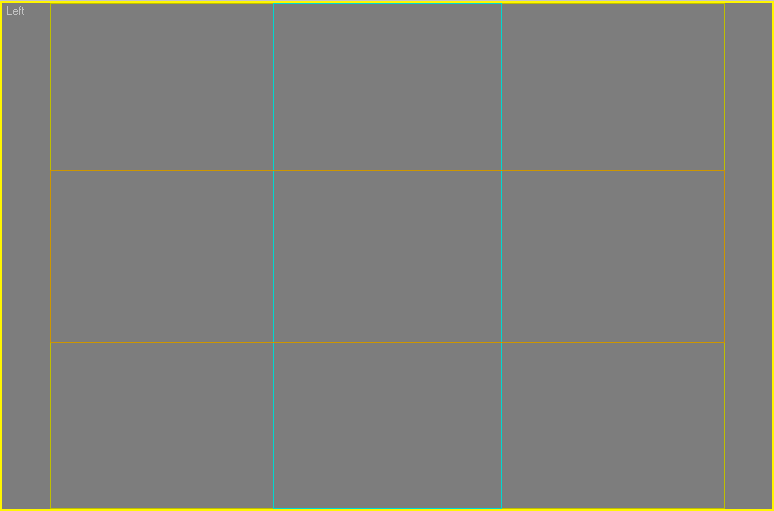
Now you can compose your 3D scene using the guide in much the same way as you would using a traditional camera.